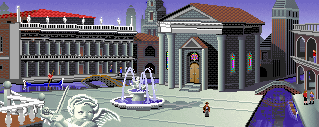

Ah Venice!
You'll meet your contact, Dr. Schneider, here and
after seemingly getting along rather well, will bizzarely find
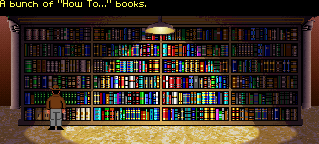
yourself stranded alone in an old church cum library. This bit is
just like in the film, except not quite as easy. The church
itself is divided into 12 sections and is circular. Walk around
it and you will see there is a screen of books followed by a
screen with a stained glass window followed by a screen of books
and so on, until you find yourself at the entrance again.
There are 6 sections of books and 5 sections of windows (plus the
entrance makes 12 see?).
Every screen of books has two rows. You can access them from the adjacent window screens (you'll see). Look at the plaques at the end of each row for tons (and tons) of references and jokes (with everything from George Lucas to the Marx Brothers). The books are not especially important, but there are three here you can pick up. Each of them makes the game easier. One shows you maps of the section beneath the library (which is where you are heading). One shows you how to fly a bi-plane, thus allowing you to bypass the entire Zeppelin section later on! While the last is a copy of Mein Kampf which you can give to a tough guard instead of fighting him or use it get past a particular road block. (As usual even after you have picked them up you still have a choice wether to use them or not, which is pretty handy, so you may as well get them.)
How to find the books: (zero IQ
points, but can gain a potiential 25 from using them later)
Each row of books is divided into 4 columns. On a row with a
collectable book, one of the columns will be different from the
rest (ie... the first 3 columns are books on Snakes and the
column could be entitled "Maps of Ancient Italy").
Having identified the different column you then have to scan each
book with the WHAT IS command until 'books' is replaced by 'book'.
This is a book you can pick up.

Remember, there are three to find.
One with a Green Cover (how to fy a Bi-Plane aka Manual), one with a Red Cover (Hitlers Mein Kampf) and one with a Brown Cover (Book of Maps).
To progress though, you'll have to find the catacombs under the library. In the film it was simply a matter of finding a big 'X' on the floor and smashing it. In the game however things are never that easy. Through the five window screens (each with 9 Roman numeral slabs on the floor) you have to find the one right slab to smash.
How to get under the Library: (10 IQ points)
The first thing you need is the metal post (if
you don't already have it). Keep walking from screen to screen
until you see the metal post with a red cordon
attatched to it. Pick up the cordon and then grab the post. Next
thing to do is make sure you're on the right screen. Click on USE
grail diary to see what your Dad has written
about it. You'll be shown a picture of a stained glass window and
a quotation. Ignore the quote and look at the window. You need to
find the screen with that exact window in it. They may
look the same, but make sure the angels are facing the right way
and the image above the sheild is right (not a grail instead of a
sword etc).
After you think you've found it -- double check! They all look pretty alike. Now look at the quotation it should be something like "The Third On The Left". If you look at the screen there are two pillars either side of the window. Each has a plaque on it with three Roman numerals. "The Third On The Left" would mean you should look at the Third Roman Numeral on the Left Column. Got that? After you think you have the right number, locate it on the floor and smash it with the metal post.
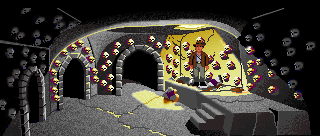
If pick the right slab you get yourself (10) IQ points and a rather scary looking room. (If you didn't keep trying until you do!)
This is the entrance to the Catacombs!
![]()

Indy knew she was a Goth,
but this was just too much
Ok, you've got yourself three doors, lots of skulls and some scary music... what do you do? Well this bit purely down to luck... the correct door changes from game to game. One door will lead to victory (and the rest of your adventure), while the other two lead to instant death and the automatic deletion of all your Indy save game files and any stored IQ points.
Not really.
Pick anyone you like (you'll find yourself in virtually the same spot). Before you go though take a peek at the Book of Maps (should you have picked it up).
From now on it's a top down view through the maze like catacombs. You'll eventually come across different rooms. If you want to do this (lengthy) part of the game yourself just take note that each room is important in some way (either for an object there or a hidden entrance or whatever), it may not be immediately obvious what you have to do in each room, but scan each one carefully and remember what you see. Another good hint is, when you're lost in the catacombs, keep and eye out for different coloured walls. These are nearly always coloured because of light coming from the rooms. (Note: this only works for the 256 colour people, not on any 16 colour versions (sorry Amiga owners!).)

Ok, the rest of you lazy cheaters read this bit: The first room you come across marked (1) on the map above has some dead pirates in it. Remember what I said about each room being important? Well in this one you get the pirates hook aka (hook). Pick it up and move on. The second room (2) has a torch in it. If you try pulling it you'll discover it's caked in dried mud (hmmm). The third room (3) has a useless (for the time being) stone slab in it. The next room (4) is filled with water. Note the plug at the bottom. Keep going and you'll find a fifth room (5). Head towards the grating and you can see the tomb you're heading for, but you won't be able to get there just yet. There's also a manhole cover in the ceiling. Open this and head outside. You'll find yourself in the resturant where you began. Have a look around (there are a few jokes to be seen*). Go over to the lovers on the left and make the guy look like an idiot by trying to pick up the bottle of wine on the table, looking at the label and trying to pick it up again... ho ho ho!
*More Trivia: Apparently the original Lucas crew were big dog lovers, and Indiana really was named after a dog, (George Lucas's to be precise) and so was Chewbacca from Star Wars! Note the line when Indy looks at the cat: "Why would anyone want a cat when they could have a dog?". This debate is also continued in Full Throttle's (massive) end credits sequence!
Now you've got the wine bottle go to the fountain near the library and fill it up with water (you can also use the room filled with water (4) in the catacombs if you want to be a little different). Head back down the manhole and to the room with the torch in it (2). Pour the water from the bottle over the torch to loosen the mud and then pull the torch... whoops!

You're now in the lower level of the catacombs (marked with the yellow 'X' on the map above). Follow the path and you'll soon come to a fork close to the sixth room (6) on the left. Miss this and go right for room seven (7). Note the plug and dripping water... hmmm! Where could this be linked to? Don't mess with the plug just yet, or you could mess your game up big time! Instead head over the bridge and into the cave and have a look at those inscriptions. These are your first clue as to what the Grail actually looks like. Write these down somewhere! There will be the two names of two different accounts of the grail. You have to cross check these with the Grail Diary that came with the game. One of these is the correct account of the Grail, (but you won't know which one until you get to Castle Brunwald), and you'll have to use it to pick the right grail from a load phoney's at the end of the game. Needless to say these accounts change from game to game.
Now you've written down the names of the accounts (you have haven't you??) head back to the room with the dripping plug (7). We are going to drain the room with water in it. Push the hook into the plug and then use your whip on it. Indy will pull the plug, releasing the water and destroying the bridge in the process (like I said you have written those accounts down haven't you?). You'll get (5) IQ points for pulling the plug.
Now we need to get back to the water room (4). To do this go to room (6) (the one you missed a second ago) and climb up the ladder. You'll pop up in the room with the (until now) useless stone slab (3). Head right for the water room. Ta da! It's all been drained. Tumble down those rocks and through the exit on the right side of the screen.
Head left to room (8). In this room is some dormant machinery. You can pull the wheel but none of the machinery moves. You need to tie the red cordon to wheel and then try again. This time the whole machine will come to life and lower a draw bridge in room (10). It saves having to come back if you do it now. Now that's done get going to room (9). In here is another puzzle for you. Look in your fathers Grail Diary and you'll be shown a screen with two diagrams on it. One that shows the correct combination, and another combination labled 'Certain Death'. (In fact 'Certain Death' here means being dropped through a hole in the floor into the manhole room (5), so not too bad then.)
In order to get the right pictures up there's a very simple process you can go through to guarantee you won't have to walk all the way back from room (5). You see, if you push the first plaque it will flip the second one as it goes, and it you push the third plaque it will flick the first one twice. This means sometimes you can iadvertantly cause the bad combination to pop up. In order to make sure this doesn't happen, just follow the steps below:
1) Push plaque two until it has anything other than the bad picture on it. (This will guard against accidental 'Certain Death' while you push the other two.)
2) Push the third plaque until it is right, (don't worry what this does to the other plaques).
3) Push the first plaque until it's correct.
4) Push the second plaque until it is right and - voila! The door should open.
For a little extra help, here the order in which they spin:
| KING | CASTLE | HORNED DRAGON |
| ANGEL | SWORD | HORSE |
| KNIGHT | CATAPULT | DRAGON |
| SAINT | FLAG | GOAT BEAST |
That should be enough for you to figure it out. You'll get (5) IQ Points for getting it right. Onto the drawbridge room (10). If you put the cordon on the machinery in room (8) you can just stroll over the bridge if not you'll have to go back and do it in order to lower the bridge. In this next bit of catacombs just keep heading left ignoring the passages heading down (they're all dead ends) and make your way to room (11). Yet another little puzzles for you here. Again look at the Grail Diary, but this time you'll be shown a tune that you'll have to play out on the skulls(!). Here's how the bars correspond with the skulls:
Skulls are numbered from LEFT. Each number corresponds with a Note on the musical scale...
(1) =============
(2) -------------
(3) -------------
(4) -------------
(5) =============
(6) - - - - - - -
So if you got the following piece of music in the Grail Diary:
(1) =============
(2) --o----------
(3) ----------o--
(4) ------o------
(5) =============
(6) - - o - o - -
You'd push the 2nd skull (from the Left), followed by the 6th, 4th, 6th and 3rd.
Once you've got this right you'll get (5) IQ Points and an open doorway to the next section of catacombs. This bit is just a little maze, there's no puzzles to do. Just follow the map below and head for the (K). This is the Knights Tomb itself (gulp!).

You've made it! Now all you need to do is open the casket and take a peek inside for another (5) IQ Points. Ummm... I'll meet you outside. Just pull the rusted lock on the grating and head up through the manhole when your done. (Yikes!)
Phew! Now you'll be greeted with a short animated sequence and then it's on to Brunwald Castle!